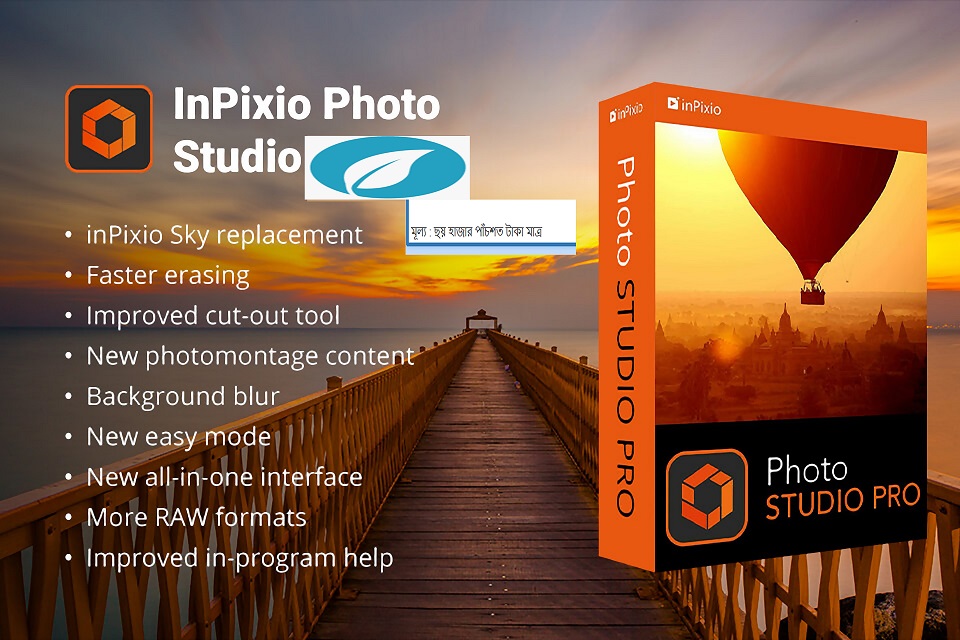
inPixio Photo Studio
আর নয় ফটোশপ , ইলাস্ট্রেটর , করেলড্র এর ব্যবহার
এবার সহজে ব্যবহার করুন inPixio Photo Studio
এটি ব্যবহার করে আপনি আপনার প্রফেশনাল কাজগুলো সহজে এবং অল্প সময়ে শেষ করুন !
যেমন :
আপনার ছবি থেকে ব্যাকগ্রাউন্ড এবং অবাঞ্ছিত বস্তু সম্পূর্ণরূপে মুছে ফেলুন। চিহ্ন, তার, মানুষ, অথবা যে কোন ছবি যা আপনি ক্যাপচার করার চেষ্টা করছেন যা আপনাকে বিভ্রান্ত করে।
ইরেজ ফাংশনটি আপনাকে আপনার ছবি থেকে যেকোনো বস্তু বা ব্যক্তিকে সম্পূর্ণ গুণমান বজায় রেখে মুছে দিতে সাহায্য করে । নির্বাচনের সরঞ্জামটিতে রঙের স্বয়ংক্রিয় সনাক্তকরণ অন্তর্ভুক্ত রয়েছে যা আপনাকে ফটোটি পুনরায় স্পর্শ করতে সহায়তা করবে।
প্রতিকৃতিগুলি পুনরায় স্পর্শ করতে ইরেজ ফাংশনটি ব্যবহার করুন। ছোটখাটো দাগ পরিষ্কার করুন এবং বলিরেখার উপস্থিতি হ্রাস করুন ইত্যাদি ।
মূল্য : ছয় হাজার পাঁচশত টাকা মাত্র
inPixio Photo Studio
InPixio Review
VERDICT: InPixio is a small “family” of editing programs. It consists of a full-fledged program, inPixio Photo Studio Professional (it is used to solve various basic tasks) and several other options, such as Photo Focus, Photo Maximizer and Eclipse HDR.
The updated version inPixio Photo Studio 11 is easier to use since it allows you to work with different interfaces in one workspace. It contains an assortment of photo editing tools. You can use it to perform skin retouching, adjust colors, delete unwanted objects and create photo collages.
In this inPixio review, we will tell you about the main advantages of this software in detail. Here, you will find plenty of AI tools and additional effects, which will come in handy for aspiring photographers.


InPixio Photo Studio 11 was significantly upgraded, which allows you to use it for sky replacement, AI photomontage, quick deletion, blurring the background, one-click photo editing, etc.

What I really liked so much is that all the features in the trial version are available and the program has absolutely no advertising and constant reminders that you should definitely purchase the full version. That’s why I can’t put inPixio on the list of best free photo editor.
InPixio Modules


InPixio Photo Editor Review
If you have ever used inPixio Photo Studio 11, you might already know that it is a free photo editor released by the InPixio group. In earlier versions, you had to switch between three different interfaces (inPixio Photo Eraser, Photo Cutter and Photo Editor) to access dedicated tools for performing various tasks. However, in inPixio Photo Studio 11, you can quickly remove people, objects, backgrounds, create collages and edit images using a single well-thought-out interface.
Customizable Interface and Easy Mode

What makes inPixio Photo Studio 11 Pro so convenient is its fully customizable interface. You can add or remove widgets to adjust the interface to your liking. This way, it will be easier for your to adjust colors in landscape photos, fix perspective distortions, add HDR effects or remove skin blemishes and dark spots.
Besides manual setting adjustment, you can edit your photo in Easy Mode. It will help you quickly remove unwanted items, adjust colors by using effects and curves, resize your image and fix the perspective.
Getting Started and Uploading JPEG
In addition to uploading JPEG, PNG, BMP and some similar formats, the developers added RAW files support in the updated version of inPixio Pro. That is good news for many users. Most photographers like working with RAW images because it gives them more control over the final result.

I didn’t want to form the judgment by InPixio Photo Editor reviews only. That’s why for the retouching I decided to pick up the most standard portrait on a neutral background, so it’s much easier to judge the usefulness of effects and other tools that this program offers.
EXIF Data and Useful Histogram
When downloading RAW files, you can view and edit all the information, including date and location. As it is mentioned in most inPixio reviews, you can add tags and ratings or even copyright information to a photo. The second option is usually popular with freelancers uploading their photos to various online platforms, such as Flickr.
Another useful tool is a histogram. It automatically measures the exposure levels in your photo so you can figure out how to adjust the light and dark areas of the image.
One-Click AI Improvements

The Auto Correction tool that was introduced in inPixio 9 has undergone significant changes since then. Nowadays, it’s a comprehensive AI solution for color correction on the go.
In inPixio Photo Studio 11, you can analyze a photo in no time by using AI tools. This software will adjust colors and fix composition issues, which allows it to improve your photo’s dynamic range automatically.
Updated Filmstrip Panel

A Filmstrip panel that displays all the images has finally been improved. In version 10, it is completely interactive now. It means that you can easily filter images by date of shooting, camera, file type and a number of other criteria.
You can also apply changes directly from the Filmstrip. For example, you can automatically correct an image with a simple right-click without opening it in the workspace. It is possible to delete changes in the same way.
Oversaturated and Dim Presets

The first thing that I could not but try was the presets. There are more than 100 presets available and they are divided into 10 categories. But to be honest, there are only 2-3 decent presets in all the collection, while others have a very strange effect.
They made the photo either oversaturated or vice versa too dim, so the quality of the presets is very low. By the way, you can’t control the way the presets work.

I couldn’t decide what preset to use, so I chose a simple “Texture” variant. After I applied it, there were slightly visible changes, a little color correction. The background tone became more pleasant and the skin color more natural.
Any manipulations with presets are rather inconvenient since there are only 4 presets you will see on the screen. So, you will need to spend approximately 20 minutes to choose them. And in the end you’ll get sick and tired of this.
Inconvenient Curve Feed

Next, you should examine the Adjustment tab of InPixio Photo Editor, which opens an access to the standard changes in exposure, saturation, and sharpness of the pictures. Still, it is not clear why there is a separate tab for Tone Curves.
In general, making all the changes is very inconvenient as you will see them displayed in a large window. Though, it is better to observe them in a small window in the upper right corner.
Correct Gradient from Lightroom

The next function available in the program is that you can make the gradient. The way you control the process is completely copied from Lightroom and that’s why it is very convenient and easy to understand. But the work of the gradient itself is so good.
In the photo, even with the slightest application of a gradient with the blurred edges, you will see a clear transition and a sharp line of this transition that cannot be corrected with the tools of InPixio Photo Editor.
Superb AI Sky Replacement

Unlike most alternative solutions, inPixio Photo Studio 11 uses advanced sky replacement technology. Open the “Sky” tab to select the part of the sky that you need to replace. Then, you can add the sky from the library of free images and save the changes.
What makes this tool unique is that AI automatically adjusts a dynamic range and background blur. By using inPixio Photo Suite, you can make your images look more natural, without oversaturated colors.
Besides, you can use edge smoothing tools to make contours more accurate and focus on small details that are difficult to notice. For this, you can use a yellow marker or sliders. By mastering these tools, you can optimize your workflow.
Auto Erase Function

By using the “Erase” tool, you can quickly and easily delete any distracting objects. It was introduced in inPixio Photo Studio 10, but since then it was significantly improved. Now, it allows you to clone and paint a deletion area with better precision. Besides, now, you can delete items 7 times faster.
All you need to do is to create a mask over an object that you want to delete, click on “Erase” and wait until the program performs the task.

For better precision, you can adjust the brush size, change its type or indicate that you want to select several items. You can also use a tool that allows you to restore a deleted object if you’ve made a mistake.
Semi-Automatic Selective Retouch

The “Selective Retouching” tab helps you customize individual sections of the photo using special gradients or brushes. You can change some settings using the following sliders: hue, white, black, blur, sharpness and noise reduction.
In practice, this tab is not as useful as the developers claim since most of these tools are already scattered throughout the picture editor.
AI Background Removal, Replacement and Blur

By using inPixio, everyone can quickly delete unwanted details or objects in their photos. You just need to use a dedicated slider for selecting an object that you are going to remove. Then, the software will automatically remove the selected area. It makes the newest version more convenient to use than inPixio Photo Studio 10. But if you are a beginner photographer and want to avoid problem areas when cropping out your subject photo, you can turn to professional product retouching services.
In inPixio Photo Studio 11, you can cut out objects with better precision by using advanced tools that allow you to select complex objects, such as hair.
After cutting out objects, you can combine them with various backgrounds to create photo montages or collages. You can either select one of the available backgrounds or export your own to make your photo more unique.

Besides selecting, removing or replacing the background, you can adjust the background blur to create a bokeh effect. This way, your photos will look like they were taken with a camera with a professional lens. To achieve this effect, you need to move the slider.
Incorrect Sharpness and Noise Reduction Settings
The next tab for image editing is called “Correction” and allows you to make slight improvements. But the truth is that sharpness is completely useless, even having set the value to the maximum rate you won’t see absolutely any changes.
Confusing Effects

The next set of tools is called Effects and I do not quite understand why Color balance and Vignetting, for example, could not be included in the “Adjustment” where they would be more useful.

I liked the creative blur effect, which allows you to select the part of the photo that you want to keep clear and blur everything else. Actually, this was the way I achieved a smooth gradient transition line.
The most terrible thing about this tool is that you cannot work properly with a brush. With each click, you will see this annoying inscription “Processing”, which will make the work of the whole program will very slow.
I do not see anything complicated in the functioning of such a small tool. Besides, I don’t understand why it’s necessary to perform the “loading” after each click.

The Film Grain effect increases the graininess of the photo. I have come across the InPixio Photo Editor review and understood that this effect may be useful for some photographers.
The vignette tool works the same way as in other editors. But the function of both dark and light vignettes isn’t a standard one.
Quick and Unique Photo Collages

Another useful feature introduced in inPixio Photo Studio 11 is the Photomontage tab. Here, you can quickly and easily combine several images, replace the background, add stickers, text and frames. You can also cut out objects from your photos to add them to other images.
Classic Set of Frames

You can add a frame to your photo, but I never use frames in such programs and do not see the reason to do it. In most cases, a frame spoils the picture, instead of making it more interesting. This, by the way, reminded me of Fotor.
Oversaturated and Stupid Textures

In the Textures toolbox, there are a few interesting effects that can slightly improve your photo by adding a few extra colors to it. There are also some oversaturated stupid effects and I’m not sure if anybody uses them. Fortunately, there is InPixio trial you can use to check the tools.
Working Semi-Automatic Vista Correction
A smart new feature is a Perspective tool that will be useful for correcting buildings and architecture shots. The tool will help you eliminate distortion and fix any tilted or distorted object in photos.
Three automatic settings are offered for correction. They include horizontal, vertical and full correction. When auto-correction does its job, you can use simple sliders for tuning. Finally, if you want to have full control over the process, there is also a manual mode. It allows you to apply guides to your photo to make an accurate correction.
Video Tutorials and HELP Tools
A detailed and regularly updated database is now available in one click from the interface. This resource anticipates potential user questions and provides full answers to offer improved help. This is another useful feature of this photo editor that is worth noting in this inPixio review.
Besides, tutorials have been added to the new user support section to make its help as informative and effective as possible. They provide an easier and more effective way to get started.
Export with Watermarks

The most interesting thing happened when I was trying to save the edited photo. I saw such an ad saying that the photo I want to save will contain watermarks until I buy the full version of the program. There wasn’t any chance to choose the format or anything else. After saving and rather long waiting I finally got such a photo:

I’m very disappointed in InPixio. What is the reason to offer InPixio trial version if you can’t it normally use? Hardly anyone will want to have a photo with watermarks. Everything in the program is completely free and available but what’s the use if you can’t save any photo and look at the changes you made.
The most interesting is that even Adobe products have fully working trial versions of all programs and not for 5 days as InPixio, but for 14. That’s why I can say that InPixio developers just try to get more money and don’t bother about helping users with image editing.
Eclipse HDR Pro
In 2021, inPixio added a couple of separate programs, such as Eclipse HDR and Eclipse HDR Pro. They allow you to create beautiful photos with perfect lighting and tones.
The main purpose of Eclipse HDR Pro is to increase the dynamic range of the photo by adding backlight and choosing the right tones to create a perfectly exposed and more realistic looking image.
Advanced HDR Effect

One of the advantages of this software stated in many inPixio reviews is the ability to add HDR effects to a photo. It means that even if you don’t have the equipment, such as an HDR camera for multiple exposures, you can still create amazing HDR-style photos with bright lighting and color.
Advanced HDR Effect

Another thing that makes Eclipse HDR easy-to-use is presets. You can test various effects in your photo with one click. Presets can give you a professional-looking result in several seconds. This feature allows the program to stay on par with various inPixio competitors.
Advanced Tone Mapping Engine

A professional version of Eclipse HDR offers you an advanced Tone Mapping Engine. This tool produces perfectly exposed, natural-looking HDR images without the usual halos and color change problems. You can also accurately edit RAW images using a wide selection of adjustment curves. Moreover, it is possible to remove noise from your HDR photos.
Individual Lighting

A professional version of the program contains another unique feature that should be mentioned in this review inPixio. It is the HDR Relight module. It allows you to choose which lighting areas you want to show in the photo. The software automatically detects light sources in your image and allows you to turn them on and off one by one. You can also modify your light sources to change day and night or completely change the color of the light.
InPixio Photo Focus Review
Getting Started and Minimal Differences

At the first opening, I immediately realized that the program isn’t inherently different from InPixio Photo Editor, only the functions are significantly reduced and concentrated mainly on the focus adjustment.

In the upper part of the screen, you may see quick actions with a focus that you can do. There are only four of them – Architecture, Landscape, Macro, and Portrait.
Incomplete Semi-Automatic Mode

Here is the result of the Portrait action applying. I will not say that this is the best blurring possible. Lots of unnecessary things were blurred, especially the fingers. The artificial blurring is very noticeable. I would not use it for my photos, and especially because it cannot be changed.

The Sharpen button makes unnecessary graininess throughout the photo, which significantly degrades the quality of the entire picture.
All in all, the program is useless; it has the same functions as the InPixio Photo Editor but in a reduced variant, it also lags with Creative Blur and also does not save a photo without watermarks. The general conclusion about the program is that it’s totally useless.
InPixio Photo Maximizer Review
Having started the program, I laughed out loudly as the guys from InPixio made 6 absolutely identical programs. Each program has one additional function that distinguishes it from the others. So, if you want to get everything at once, think about InPixio Photo Editor free download.
Intensive Scaling by 1000%

The only difference between Maximizer and other InPixio programs is the possibility to maximize the photo by 1000%. But even this function is completely useless, as you can do only cropping, color correction and noise reduction, using this module.
Such an intense zooming you will need only if you are working with really gigantic images, which are, by the way, can hardly be opened in this InPixio app. I opened the photo in the resolution of 6000×4000 but I sincerely do not understand what can be done with this zooming.
I don’t see the point of purchasing the program, as the same image manipulations can be done in Photoshop. Besides, the latest wins InPixio vs Photoshop battle when it comes to the number of useful tools and functions. The funniest (or the saddest) thing is that this program costs $49.99, and actually, it doesn’t do anything important.
InPixio Mobile Review

After testing the newest, significantly upgraded version of inPixio Photo Studio 11, I decided to try using its mobile app as well. Here, you will find a variety of photo editing tools. Besides, in inPixio Mobile, you can take photos using an in-built camera tool.
Trying to take pictures, I realized that the application does not know how to somehow “help” a phone while shooting, so I proceed to image retouching. The menu is very narrow and allows you either to save a photo or to start the image retouching. I really don’t understand what is the use of this menu.
The choice of tools is quite wide, like in the other similar apps. The changes are made with the help of the slider, but the problem is that they are applied too abruptly and there is no scale to see the degree of the used effect. At first glance, there are a lot of tools, but if you look closer at the most interesting ones, such as Effects, you will notice that inPixio developers wanted to earn more money even in such a way.
There are only 2 free effects, and the rest will cost $2. In fact, inPixio Photo Editor mobile is useless because it does the same actions as Instagram, and offers the same filters, but it requires additional payment for this.
InPixio Photo Transfer Review
InPixio Photo Transfer lets you quickly upload and back up photos and videos from your iPhone to a computer via Wi-Fi. Your images are transferred locally so they never go online. It doesn’t matter whether you want to transfer photos for backup to your computer or share them with your friends, inPixio Photo Transfer will do the job in a few seconds.
Before you start transferring photos, make sure that your iPhone and computer are connected to the same Wi-Fi network. Then you can start the process. To avoid any inPixio problems at this stage, follow a few simple steps:
- Download and open the free app on your iPhone/Android.
- Enter the URL specified by the application in a web browser on your computer.
- Select photos or videos to download and save to your PC.
InPixio FAQ
- • Can I perform selective retouching?
Yes, inPixio Photo Studio 11 Professional has developed a separate selective retouching module with sliders for temperature, hue, denoise, and dehaze.
- • How to download free InPixio?
A simple and free way to download inPixio Photo Editor is described in the article.
- • Does inPixio support batch photo processing?
No, the developers did not add a batch photo processing feature.
- • What RAW files are included in the inPixio database?
Among the supported Raw Files are NEFF, TIFF, DNG, CR2, ARW, and many others.
- • Can I install third-party plugins?
No, you can only use the built-in effects and filters.
All InPixio Software Review
InPixio Photo Studio 11 Review: In 2021, the developers have released the newest version that will come in handy for aspiring photographers and experienced professionals alike. It comes with an easy-to-customize workspace, AI cropping tools, and features that allow you to blur or replace the background or the sky. Besides, this software supports most RAW formats, allows for one-click AI editing and contains loads of effects and LUTs that will help you embellish your images.
InPixio Eclipse HDR Review: This is a separate application designed in a special way for editing HDR photos. Among the tools, you will find HDR effects, presets, the Tone Mapping Engine, as well as the HDR Relight module. The last one allows you to choose which lighting areas you want to show in the photo.
InPixio Photo Maximizer Review: It happens quite often that your photos taken with a tablet, phone or even a camera are blurry, pixeled or grainy when you zoom them on the computer. The Photo Maximizer was designed to reduce or eliminate these defects. You can zoom your pictures up to 1000% and see what area need to be improved. What is important is that this app doesn’t distort the original image and the definition is saved. Using the tools, you may:
- focus;
- adjust;
- sharpen.
InPixio Photo Focus Review: Photographers sometimes ignore the tiny details of the photo, which also require editing. With this app, you’ll notice the smallest defects, adjust clarity and contrast, enhance the photo by dint of the color adjustments, sharpening and blurring tools. All the changes are saved with several mouth slicks.

Reviews
There are no reviews yet.